Polymer extrusion is the continuous process of melting a plastic material, forcing it through a shaped die, and cooling it into a finished profile, film, sheet, pipe, tubing, or pellet. I have worked with extrusion lines for commodity and engineering polymers, and the same pattern appears every time: when the process is understood step by step, output becomes more stable, scrap falls, and troubleshooting gets much faster. This guide explains polymer extrusion processes in practical terms, from raw material handling to die design, calibration, cooling, haul-off, cutting, and quality control. It also serves as a hub for tutorials and guides within broader educational resources, so readers can use it as a foundation before exploring specialized topics such as blown film extrusion, sheet extrusion, medical tubing, compounding, or recycling.
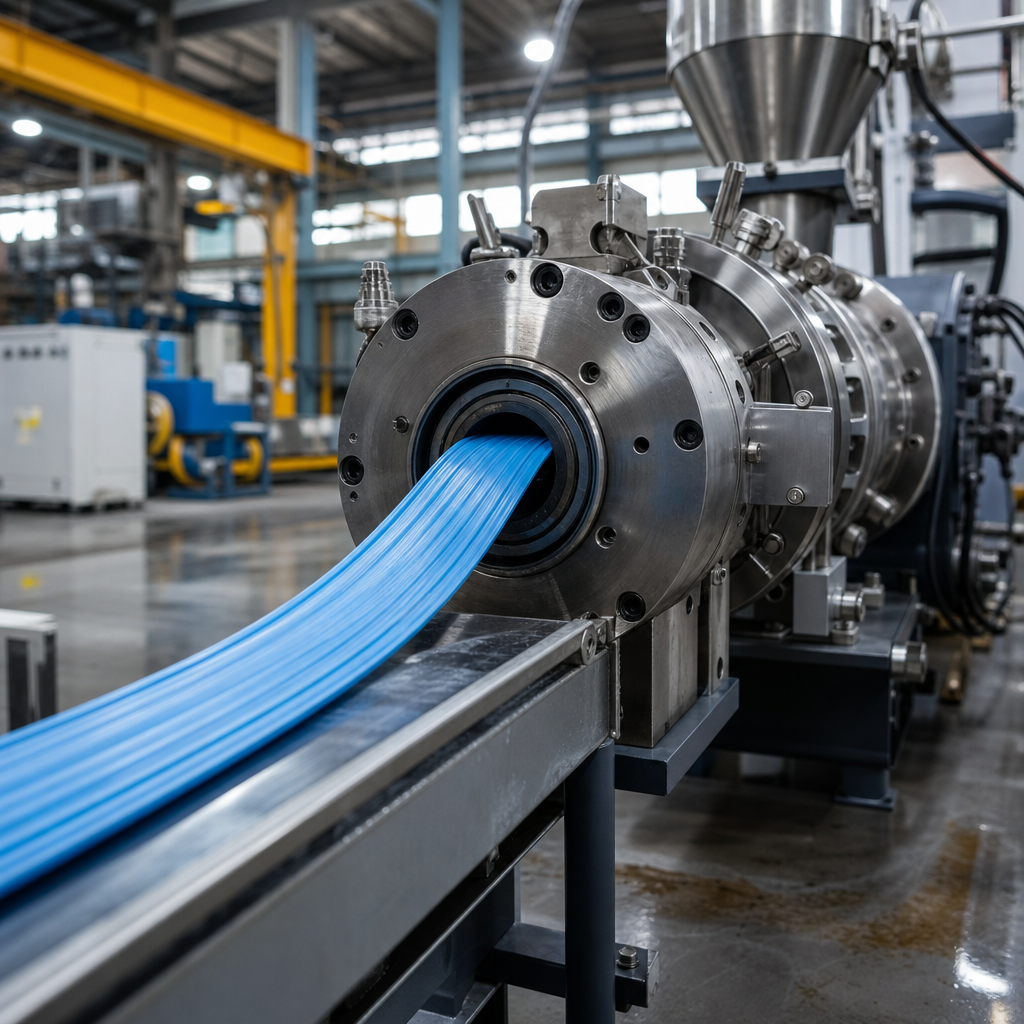
At its core, polymer extrusion converts pellets, powder, or regrind into a continuous shape using heat, pressure, and mechanical shear. The main machine is the extruder, typically a single-screw or twin-screw system. Material enters through the hopper, moves along a heated barrel, melts as the screw rotates, and exits through a die that defines geometry. Downstream equipment then stabilizes dimensions and surface quality. Terms matter here. Melt temperature is the actual temperature of the polymer, not just the barrel setting. Throughput is mass output per hour. Residence time is how long material remains in the machine. Die swell is the tendency of molten polymer to expand slightly after leaving the die because elastic stresses relax. Understanding these definitions prevents many common operating mistakes.
This topic matters because extrusion is one of the most important manufacturing methods in plastics. It is used for packaging films, water pipe, wire insulation, window profiles, food packaging sheet, fiber, and countless industrial products. According to common industry estimates, extrusion accounts for a large share of global polymer processing because it is efficient, scalable, and compatible with polyethylene, polypropylene, PVC, polystyrene, PET, nylon, TPU, and many filled compounds. Yet efficiency depends on disciplined control. A poorly dried hygroscopic resin can hydrolyze. A mismatched screw can create unstable pressure. Incorrect cooling can warp the profile. A step-by-step approach gives engineers, operators, buyers, and students a shared framework for selecting equipment, setting conditions, and diagnosing problems with confidence.
Step 1: Define the Product, Polymer, and Process Window
The first step in any polymer extrusion process is to define exactly what the product must do. Shape is only one requirement. You also need target dimensions, wall thickness, tolerance, stiffness, clarity, chemical resistance, impact strength, regulatory constraints, and line speed expectations. A drinking straw, a multilayer food film, and a pressure-rated HDPE pipe may all come from extrusion, but they demand different dies, cooling methods, and resin grades. In practice, I start with the drawing, application temperature, required certifications, and expected annual volume. That early work determines whether a simple single-screw line is enough or whether the application needs venting, coextrusion, gravimetric blending, precise gauging, or vacuum calibration.
Polymer selection follows product definition. Commodity resins such as LDPE and PP process easily and tolerate wider conditions, while engineering resins like PA or PC need tighter thermal control. PVC is especially sensitive because degradation can release hydrogen chloride if melt temperature runs too high, so screw design and stabilization chemistry are critical. Hygroscopic materials such as PET, TPU, and many nylons must be dried to specification before processing; otherwise molecular weight drops and mechanical performance suffers. Supplier data sheets provide a starting range for melt temperature, recommended screw speed, drying time, and moisture content, but production settings still need validation on the actual line because die geometry and throughput change the shear history significantly.
Step 2: Prepare Raw Materials and Feeding Systems
Stable extrusion begins before the polymer enters the barrel. Raw material preparation includes drying, blending, contamination control, and feed consistency. Pellets should be kept sealed and labeled by lot. Regrind must be screened for fines and introduced at controlled percentages because irregular bulk density affects feed rate. Color masterbatch, UV stabilizers, slip additives, fillers, or flame retardants should be metered with gravimetric feeders when accuracy matters. Volumetric feeders are cheaper, but they drift when bulk density changes. In commercial operations, a gravimetric blender often pays for itself by reducing color variation, overuse of additive concentrates, and startup waste.
Material handling also affects quality. Dust buildup in a hopper can bridge and starve the screw. Wet compressed air can reintroduce moisture after drying. Magnets and metal detectors protect the screw and die from tramp metal. For PVC dry blend or powder systems, feeder design matters even more because flood feeding can create surging. A good tutorial mindset is simple: if feed composition varies minute to minute, melt quality will vary too. Many pressure fluctuations blamed on the screw are actually caused by inconsistent feeding upstream.
Step 3: Understand the Extruder, Screw, and Barrel
The extruder generates the pressure and thermal energy needed to create a homogeneous melt. In a single-screw extruder, the screw usually has feed, transition, and metering zones. The feed zone conveys solid polymer, the transition zone compresses and melts it, and the metering zone evens out flow before the die. Barrier screws add separate melt and solid channels for better melting efficiency. Mixing sections such as Maddock mixers or pineapple mixers improve distributive and dispersive mixing, especially when color or fillers must be uniform. Twin-screw extruders, especially co-rotating intermeshing designs, are preferred for compounding, reactive extrusion, devolatilization, and difficult blends because they provide stronger mixing and more flexible screw configuration.
Barrel heaters do not do all the melting. In most production lines, a large share of melt energy comes from viscous dissipation created by screw rotation and shear. That is why increasing screw speed can raise melt temperature even if barrel settings stay unchanged. Operators should track barrel zone settings, adaptor temperature, die temperature, melt pressure, motor load, and actual melt temperature from a probe or handheld sensor. Those readings reveal whether the line is running within a healthy process window. High pressure with low output may indicate a blocked screen pack, a restrictive die, or material degradation. Low pressure with unstable dimensions may point to poor feeding, low melt viscosity, or excessive temperature.
Step 4: Set Temperature Profile, Pressure Control, and Filtration
Temperature profiles should match the polymer and screw design rather than follow a generic recipe. A common starting strategy is cooler feed zones to prevent bridging, then gradually increasing temperatures toward the metering zone and die. However, some materials benefit from flatter profiles, and some high-output lines use lower barrel settings because shear provides substantial heat. The goal is a melt that is fully fused, uniform, and not thermally damaged. For example, HDPE pipe often runs with melt temperatures in a range that supports strong weld lines and smooth surfaces, while PET sheet extrusion requires careful drying and melt management to preserve intrinsic viscosity.
Filtration is equally important. Screen packs and breaker plates straighten flow, build back pressure, and remove contamination. Recycled content, filled compounds, and post-industrial regrind typically require more robust filtration. Automatic screen changers reduce downtime and stabilize pressure compared with manual systems. When pressure rises steadily over time, a plugged screen is usually the first suspect. When pressure spikes suddenly, contamination or gel formation may be involved. A disciplined record of pressure before and after screen changes is one of the easiest ways to improve extrusion process control.
Step 5: Shape the Melt with the Right Die and Downstream Setup
The die converts pressurized melt into the required geometry, and die design is where many tutorials stay too theoretical. In real production, good die performance depends on balanced flow, manageable pressure drop, thermal uniformity, and practical cleanout access. Tubing and pipe use annular dies with mandrels. Sheet and cast film use flat dies, often coat-hanger or T-die designs. Profile extrusion uses custom tooling tailored to uneven wall sections and dimensional shrinkage. Because polymers are viscoelastic, melt does not behave like water. Areas with long land lengths or abrupt turns can create stagnation, causing black specks, gels, or degradation.
Downstream equipment finishes what the die starts. Vacuum calibration tables are standard for PVC profile and pipe because they pull the hot shape against sizing tools. Water baths remove heat, but cooling rate must be balanced; quenching too aggressively can lock in stress or distort thin sections. Haul-off speed controls final dimensions as much as die size does. In blown film, the bubble diameter, frost line height, and nip speed define gauge and orientation. In sheet extrusion, chill roll temperature, roll gap, and polish roll pressure determine thickness and surface finish.
| Extrusion product | Typical die type | Critical downstream control |
|---|---|---|
| Pipe or tubing | Annular die | Vacuum sizing and haul-off speed |
| Sheet | Flat coat-hanger die | Chill roll temperature and roll gap |
| Blown film | Annular film die | Blow-up ratio and frost line stability |
| Profile | Custom profile die | Calibration tooling and cooling balance |
| Wire coating | Crosshead die | Concentricity and line speed |
Step 6: Start Up, Stabilize, and Monitor Quality
A controlled startup prevents waste and protects tooling. Confirm material, temperatures, screen pack, die bolts, cooling flow, and safety interlocks before rotation begins. Bring the screw up gradually, purge previous material completely, and watch pressure rise as the die fills. Early output often shows contamination, gauge variation, or color streaks until the system reaches thermal equilibrium. I treat the first stable sample as a process checkpoint, not proof that the line is optimized. At that point, measure dimensions, ovality, wall thickness, gloss, haze, and weight per unit length or area, then compare with specification.
Modern quality monitoring adds instrumentation beyond handheld calipers. Ultrasonic wall gauges, laser diameter scanners, beta or infrared thickness gauges, and melt pressure transducers provide continuous feedback. Statistical process control helps separate normal variation from real drift. If output is on target but dimensions fluctuate, investigate haul-off speed, vacuum consistency, or die temperature uniformity before changing the resin. If gels appear in film, examine contamination, degradation, and dead spots in the adaptor. If the surface shows sharkskin or melt fracture, reduce shear stress by adjusting temperature, output, die geometry, or resin grade.
Step 7: Troubleshoot Common Polymer Extrusion Problems
Most extrusion defects can be traced to four root causes: material issues, thermal imbalance, flow imbalance, or mechanical instability. Surging often comes from poor feeding, partially melted solids, or trapped volatiles. Bubbles in extrudate can indicate moisture, air entrainment, or inadequate venting. Die lines may be caused by contamination, damaged tooling, or buildup at the lip. Warpage in profiles usually points to uneven cooling or asymmetric die swell. Burn marks suggest stagnation or overheating. A practical troubleshooting method is to change one variable at a time and record the response. Random adjustments create confusion and prolong downtime.
Maintenance is part of troubleshooting, not separate from it. Worn screws and barrels reduce pumping efficiency and increase melt variation. Heater bands fail gradually. Thermocouples drift. Vacuum tanks accumulate scale. Puller belts glaze and slip. Scheduled inspection based on hours, pressure history, and dimensional capability is far cheaper than emergency downtime. Standards and tools help here. MFI or MFR testing checks whether resin viscosity has shifted. Differential scanning calorimetry can reveal contamination or crystallinity changes. Microscopy can confirm gels, unmelt, or filler dispersion problems. The best operators combine machine knowledge with simple test methods and disciplined records.
Polymer extrusion processes reward methodical thinking. Define the product clearly, prepare materials correctly, match the screw and die to the resin, control melt temperature and pressure, and use downstream equipment to lock in dimensions. When quality drifts, start with facts: measurements, pressure trends, temperature data, moisture levels, and visual evidence from the extrudate. That approach turns extrusion from trial and error into a repeatable manufacturing system. For teams building educational resources, this guide works as a hub because every specialized tutorial grows from the same fundamentals explained here.
The main benefit of understanding extrusion step by step is control. Better control means lower scrap, faster startups, fewer defects, and more confidence when introducing new materials or products. It also improves communication between engineers, operators, purchasing teams, and customers because everyone can describe the same process in the same terms. Whether you are learning polymer extrusion for the first time or refining an established line, use this framework to audit your current process and identify the next topic worth studying in depth.
Review your product requirements, map your line from hopper to cutter, and document one improvement you can make this week. Then use that result to guide the next tutorial in your extrusion training plan.
Frequently Asked Questions
1. What are the main steps in the polymer extrusion process?
The polymer extrusion process follows a clear sequence, and understanding each step makes it much easier to run an efficient line and diagnose problems quickly. It begins with material preparation, where the resin is selected, dried if necessary, and blended with any additives such as colorants, stabilizers, fillers, or regrind. This step is critical because poor material handling often creates downstream issues like bubbles, inconsistent dimensions, surface defects, or degraded melt quality.
Next, the polymer enters the extruder through the hopper and is conveyed forward by the rotating screw inside the heated barrel. As the material moves along the screw, it is gradually heated by a combination of barrel heaters, shear, and compression. The solid pellets soften, melt, and become a homogeneous polymer melt. In a well-set process, the screw design, temperature profile, and screw speed work together to create a stable melt without excessive shear heating or degradation.
After melting, the polymer is pressurized and pushed through a die that gives the material its initial shape. Depending on the product, the die may be designed for pipe, sheet, film, profile, tubing, or strand extrusion. At this stage, melt pressure, die temperature, and flow balance are especially important because even small variations can affect thickness, dimensions, or surface appearance.
Once the polymer exits the die, it must be cooled in a controlled way to lock in the desired shape. Cooling may happen through air, water baths, chill rolls, vacuum sizing tanks, or calibration systems depending on the product being made. Finally, the extrudate is pulled, cut, wound, or pelletized. Every one of these steps matters. If feeding is inconsistent, melting becomes unstable. If melting is uneven, the die flow suffers. If cooling is poorly controlled, the product can warp, shrink unevenly, or lose dimensional accuracy. That is why extrusion is best understood as one connected process rather than a set of isolated machine settings.
2. How do temperature, screw speed, and pressure affect extrusion quality?
These three variables are at the heart of extrusion performance. Temperature controls how easily the polymer melts and flows, screw speed affects throughput and shear history, and pressure reflects how the material is moving through the screw, screen pack, breaker plate, and die. When these variables are balanced, the line runs smoothly and the product stays consistent. When they are not, quality issues appear quickly.
Barrel and die temperatures must be appropriate for the specific polymer being processed. If temperatures are too low, the resin may not melt completely, causing unmelted particles, poor surface finish, high motor load, and unstable pressure. If temperatures are too high, the polymer can degrade, discolor, generate fumes, or lose mechanical properties. Many processors focus only on heater setpoints, but the actual melt temperature matters more because it reflects the combined effect of external heating and internal shear.
Screw speed has a direct influence on output rate, residence time, mixing, and melt temperature. Increasing screw speed can boost production, but it also raises shear and can create additional heat. For some materials, that is beneficial and improves melt uniformity. For others, especially heat-sensitive polymers, excessive screw speed can cause degradation or surging. The ideal setting depends on resin type, screw design, die resistance, and the product’s dimensional requirements.
Pressure is one of the best indicators of process stability. A steady melt pressure usually means the feed, melt quality, and die flow are under control. Pressure fluctuations can signal bridging in the hopper, inconsistent bulk density, contamination, moisture, poor temperature control, or restrictions in the screen pack. High pressure may indicate clogged screens, a die restriction, or material that is too cold and too viscous. Low pressure can point to feed starvation, excessive temperature, or screw slippage. Experienced operators watch the relationship between temperature, speed, and pressure rather than evaluating any one number alone, because extrusion quality depends on how these variables interact throughout the entire line.
3. Why is material preparation so important in polymer extrusion?
Material preparation is one of the most underestimated parts of extrusion, yet it has a major impact on output stability, appearance, mechanical performance, and scrap rate. A well-tuned extruder cannot fully compensate for poorly prepared resin. If the incoming material is wet, contaminated, inconsistently blended, or not suited to the application, the process becomes much harder to control no matter how good the machine settings are.
Drying is especially important for hygroscopic polymers such as nylon, PET, PC, and certain polyesters that absorb moisture from the air. If these materials are processed without adequate drying, the moisture can cause hydrolytic degradation during melting. This often results in lower molecular weight, reduced physical properties, bubbles, splay, haze, and poor surface quality. Even non-hygroscopic materials can carry surface moisture that interferes with processing under some conditions, so storage and handling still matter.
Blending is another key factor. Additives, color masterbatch, fillers, impact modifiers, lubricants, and regrind need to be mixed consistently so the melt composition remains stable. Inconsistent blending can lead to color streaking, variable dimensions, unstable pressure, or sections of product with different mechanical behavior. Regrind deserves special attention because it can be useful and economical, but only when its particle size, contamination level, and percentage in the blend are controlled properly.
Good material preparation also includes practical housekeeping: preventing contamination, labeling materials correctly, avoiding cross-mixing, and ensuring proper conveying and hopper design. Small amounts of foreign material can create gels, black specks, die lines, weak spots, or customer complaints. In real production, many recurring extrusion problems trace back to material issues before they ever reach the screw. That is why experienced processors treat resin handling and preparation as the first step in process control, not as a separate support task.
4. What are the most common extrusion defects, and how can they be troubleshot step by step?
The most common extrusion defects include dimensional variation, surface roughness, melt fracture, die lines, bubbles, gels, burn marks, discoloration, warping, and inconsistent thickness. While these problems can look very different, the best troubleshooting method is usually the same: work through the process in order rather than changing multiple settings at once. A step-by-step approach is faster, more reliable, and much less likely to create new problems while chasing the original one.
Start with the material. Check whether the correct resin is being used, whether it was dried properly if required, and whether the blend ratio is accurate. Look for contamination, poor pellet flow, or inconsistent regrind content. If the material checks out, move to the feed section and confirm that the hopper is feeding consistently without bridging or rat-holing. Then review the barrel temperature profile, melt temperature, screw speed, and motor load to see whether the polymer is melting uniformly.
Next, examine pressure behavior. A stable process generally shows relatively steady head pressure. If pressure is fluctuating, inspect the screen pack for blockage, the breaker plate for buildup, and the die for restrictions or contamination. Surface defects such as sharkskin or melt fracture may suggest excessive shear stress at the die, which can often be improved by adjusting melt temperature, output rate, die design, or resin grade. Bubbles or voids may point to moisture, trapped air, or decomposition. Gels and black specks often indicate degraded material, contamination, or dead spots in the screw, adapter, or die.
Finally, review downstream equipment. Many defects that appear to be die-related are actually caused by unstable cooling, poor vacuum calibration, uneven haul-off speed, or misaligned rolls. For example, thickness variation in sheet can be linked to roll temperature imbalance, and profile distortion can result from uneven cooling or puller tension. The most effective troubleshooting mindset is to isolate one stage at a time: material, feed, melt, pressure, die, cooling, and takeoff. That sequence reflects how the product is actually made, and it leads to more accurate root-cause analysis.
5. How can manufacturers improve efficiency and reduce scrap in polymer extrusion?
Improving efficiency in polymer extrusion is usually less about one dramatic change and more about tightening control across the full process. The biggest gains often come from reducing variation. When feed rate, melt temperature, pressure, cooling, and haul-off remain stable, the line produces more saleable product with less waste, fewer shutdowns, and less operator intervention. That consistency also shortens setup time and makes quality results more predictable across shifts.
One of the most effective ways to reduce scrap is to standardize operating windows for each material and product. That means documenting target temperatures, screw speeds, pressure ranges, line speeds, cooling conditions, and acceptable startup procedures. When those standards are built from actual production data, operators can detect abnormal trends earlier and make smaller corrections before defects become large enough to create scrap. Monitoring actual melt temperature, not just barrel setpoints, is particularly useful for understanding process stability.
Preventive maintenance is another major factor. Worn screws, barrels, heaters, thermocouples, pullers, die components, or cutters can gradually reduce process control and increase waste. Dirty screens, degraded material buildup, and poor die maintenance can also create pressure instability and cosmetic defects. A