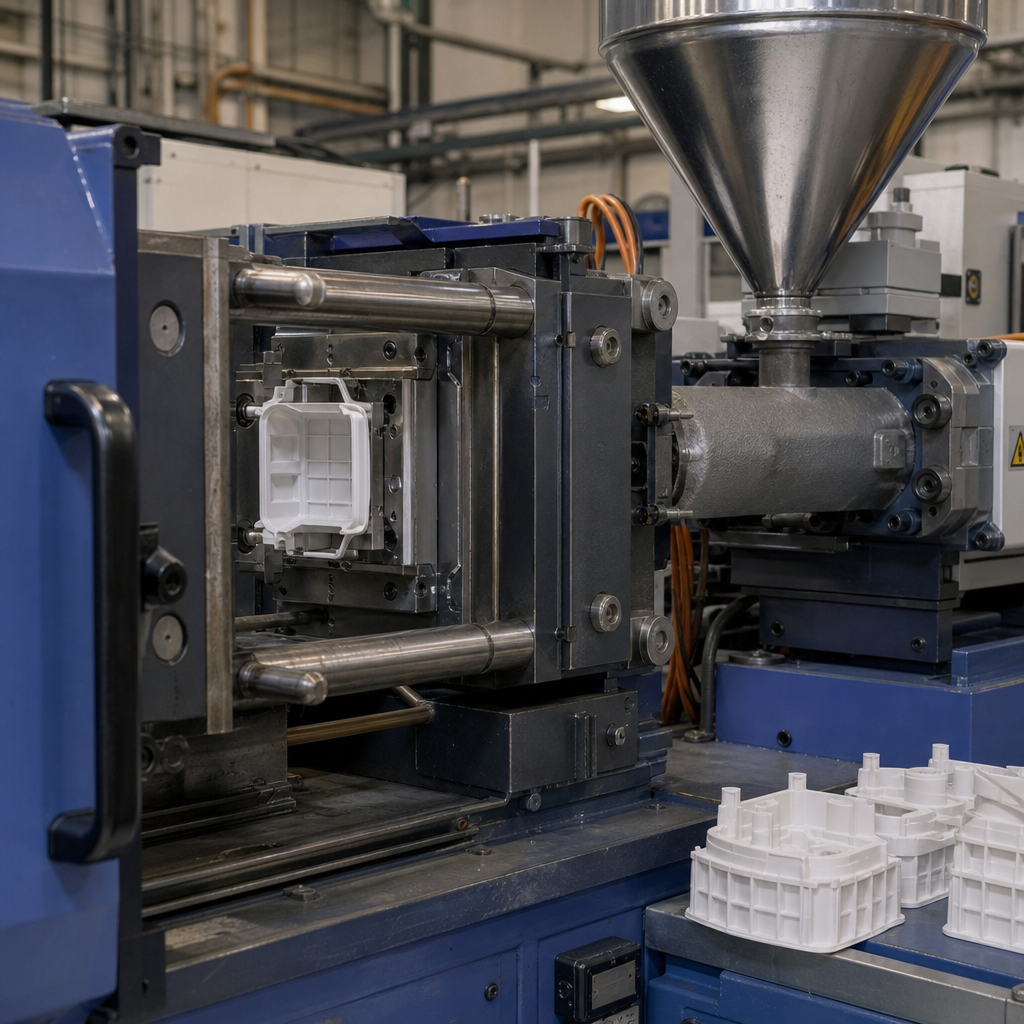
Injection molding for polymers is the manufacturing process most people encounter every day without noticing, because it produces the housings, caps, clips, medical disposables, appliance parts, automotive interiors, and consumer product shells that shape modern life. In simple terms, polymer injection molding melts a plastic material, injects it under pressure into a metal mold, cools it until it solidifies, and ejects the finished part. As a tutorial topic under educational resources, it matters because it connects material science, product design, tooling, processing, quality control, and economics in one repeatable production method. I have worked with teams that moved parts from sketch to pilot mold to full production, and the biggest lesson is consistent: success depends less on any single machine setting than on understanding the full system. A beginner needs clear definitions first. The polymer is the plastic feedstock, usually supplied as pellets. The mold is the precision steel or aluminum tool containing the cavity that forms the part. The injection molding machine has two main sections: the injection unit, which melts and meters the polymer, and the clamping unit, which holds the mold closed against pressure. Cycle time is the total time to mold one shot, including filling, packing, cooling, opening, ejection, and mold close. Understanding these terms gives readers the vocabulary needed for every related guide in this tutorial hub.
This hub article also matters because injection molding is often misunderstood as a fast, cheap solution for any plastic part. In reality, it is ideal for medium to very high volumes, tight repeatability, and parts that justify up-front tooling cost. The method rewards careful design and punishes guesswork. A small rib thickness error can create sink marks. Poor gate placement can trap air and cause burn marks. Choosing a hygroscopic polymer without proper drying can ruin impact strength and surface finish. For learners, that complexity is a benefit, not a barrier, because once the fundamentals are understood, the same principles apply across thousands of applications. This page is designed as a hub for tutorials and guides: how the process works, how to choose materials, how to design moldable parts, how to set up a process window, how defects are diagnosed, and how quality is verified. If you later explore detailed articles on mold design, resin drying, warpage control, medical molding, or overmolding, this overview provides the framework that links them together and makes advanced topics easier to absorb.
How polymer injection molding works from pellet to part
Polymer injection molding follows a defined sequence, and understanding that sequence is the fastest way to read machine behavior and troubleshoot defects. Plastic pellets are loaded into a hopper and conveyed into a heated barrel. A rotating screw transports the pellets forward, where external heaters and shear heating melt the material into a homogeneous melt. The screw then retracts to accumulate a shot of molten polymer. When the mold is closed and clamp force is established, the screw moves forward like a plunger, injecting the melt through the nozzle, sprue, runners, and gate into the cavity. The cavity fills first at high velocity, then the machine transitions to pack and hold pressure to compensate for volumetric shrinkage as the polymer cools. After the gate freezes, cooling continues until the part is rigid enough to eject without deformation. The mold opens, ejector pins release the part, and the cycle begins again. Every training program should teach this fill-pack-cool-eject sequence because nearly every defect maps to one stage.
The process seems straightforward, but each stage involves tradeoffs. Faster fill reduces weld line weakness and can improve surface replication, yet excessive speed may create jetting, flash, or trapped gas. Higher melt temperature lowers viscosity and helps thin-wall flow, but too much heat can degrade polymers such as PVC or acetal. More hold pressure can reduce sinks, but overpacking may cause stress, flash, or dimensional drift. In production, technicians often use short-shot studies to understand flow progression, gate seal studies to set hold time, and cavity pressure sensors to measure consistency directly. Real-world examples make this clearer. A polypropylene cap may run on a short cycle with a hot runner and minimal secondary finishing. A polycarbonate lens cover needs tighter control of moisture, mold temperature, and venting because appearance and impact properties matter. A glass-filled nylon bracket may require higher mold wear resistance and careful orientation control because fiber alignment affects stiffness and warpage. When readers ask what injection molding actually does, the direct answer is this: it converts polymer melt into accurate, repeatable shapes by controlling pressure, temperature, flow, and cooling in a closed tool.
Materials, part design, and the rules that prevent expensive mistakes
Material selection is the foundation of polymer injection molding because the polymer determines flow behavior, shrinkage, strength, chemical resistance, temperature capability, and cosmetic performance. Commodity resins such as polypropylene, polyethylene, polystyrene, and ABS are common for packaging and consumer goods because they are economical and process friendly. Engineering polymers such as polycarbonate, nylon, POM, PBT, and PPS are chosen when higher mechanical performance, heat resistance, wear resistance, or dimensional stability is required. Fillers and reinforcements change performance dramatically. Glass fiber increases stiffness and heat deflection temperature, mineral filler can improve dimensional control, and impact modifiers can improve toughness. Drying requirements are critical. Nylon, PET, PBT, and polycarbonate absorb moisture; if processed wet, they can hydrolyze, losing properties and producing splay. Resin suppliers publish processing guides and data sheets, and those documents should be treated as starting points, not optional reading. In practice, I rely on material data, moldflow results, and trial data together because no single source captures the full production picture.
Part design rules are equally important because good molding starts on the CAD screen. Uniform wall thickness is the first principle; abrupt thickness changes create sink, voids, differential cooling, and warpage. Ribs should usually be thinner than the nominal wall, often around 50 to 60 percent for many amorphous resins, to avoid read-through and sinks. Bosses need radii, support ribs, and spacing that limits stress concentration and cosmetic defects. Draft is nonnegotiable: textured surfaces and deep features need more draft than polished surfaces. Sharp corners should be replaced with radii to improve flow and reduce stress. Gates must be placed to support balanced filling, acceptable vestige, and proper packing of critical dimensions. Designers should also think about knit lines, ejector pin marks, vent locations, and whether undercuts justify sliders or lifters. The most expensive mistakes I see are not machine-related; they come from designs that ignore molding physics and then try to solve geometry problems with processing alone.
| Design or Material Factor | Best-Practice Guideline | Common Failure if Ignored |
|---|---|---|
| Wall thickness | Keep sections as uniform as function allows | Warping, sinks, long cycle time |
| Draft angle | Add draft on all shutoff and cosmetic surfaces | Scuffing, drag marks, ejection damage |
| Hygroscopic resin | Dry to supplier specification before molding | Splay, brittleness, molecular degradation |
| Rib thickness | Size ribs below nominal wall thickness | Sink marks, read-through on show surfaces |
| Gate location | Place gates for balanced fill and effective packing | Weld lines, shorts, dimensional inconsistency |
| Fiber-filled polymer | Anticipate anisotropic shrink and tool wear | Warp, tolerance drift, premature mold damage |
For a tutorial hub, learners also need to know that design decisions affect tooling cost and manufacturability immediately. A simple open-and-shut mold is cheaper, faster to build, and easier to maintain than a tool with multiple side actions, collapsible cores, and interchangeable inserts. Threads can be molded with unscrewing mechanisms, collapsible cores, or eliminated through snap-fit redesign. Living hinges are practical in polypropylene but poor choices in many brittle plastics. Transparent parts need polished cavities, resin cleanliness, and gate strategies that avoid visible flow defects. Structural parts often benefit from gussets and load paths rather than thick walls. This is why good guides pair material selection with design for manufacturing rather than treating them as separate decisions. The part must satisfy use requirements and process realities at the same time.
Tooling, processing windows, and quality control in real production
The mold is the heart of the process, and beginners should understand its major systems. A typical injection mold includes cavity and core steel, sprue or hot runner components, cooling channels, vents, ejector hardware, alignment features, and wear surfaces. Tool steel choice depends on volume, resin abrasiveness, polish needs, and corrosion risk. Hardened steels such as H13, S7, or stainless grades are common for longer-life production molds, while aluminum can be useful for prototypes and lower-volume work. Cooling design is one of the most important and least visible elements because cooling often dominates cycle time and strongly influences warpage. Conformal cooling, created through additive manufacturing in some advanced tools, can improve heat removal in complex geometries. Venting is equally important. Many burn marks, shorts, and diesel effects come from inadequate vent depth or blocked vents. A mold does not simply shape plastic; it controls heat transfer, air evacuation, ejection mechanics, and long-term repeatability.
Processing windows translate design intent into stable manufacturing. Operators set barrel temperatures, screw speed, back pressure, shot size, injection speed, transfer position, hold pressure, hold time, mold temperature, cooling time, and clamp force within a validated range. Scientific molding is the most reliable approach because it separates variables and establishes a process based on material behavior rather than trial-and-error alone. A viscosity curve identifies how injection pressure changes with fill speed. A gate seal study shows the minimum hold time needed before additional pressure no longer adds part weight. A decoupled process uses velocity control for fill and pressure control for pack, which improves repeatability. Industry standards and methods matter here. Process documentation often references IQ, OQ, and PQ in regulated industries, while PPAP, capability studies, and control plans are common in automotive supply chains. Tooling and processing cannot be separated in practice. If cooling is unbalanced, no amount of parameter tuning will fully eliminate distortion.
Quality control in polymer injection molding combines dimensional inspection, visual standards, functional testing, and process monitoring. First-article inspection verifies that critical features meet drawing requirements. Statistical process control tracks trends before parts go out of tolerance. Coordinate measuring machines, optical comparators, cavity pressure sensors, moisture analyzers, and infrared thermography all support robust production depending on the part. Common defects include short shots, flash, sink marks, voids, warpage, burn marks, weld lines, splay, delamination, and black specks. Each has a logical root-cause path. Short shots point to flow restriction, low shot size, poor venting, or insufficient pressure. Flash suggests excessive pressure, clamp issues, worn parting surfaces, or trapped contamination. Warpage often comes from uneven cooling, orientation effects, or nonuniform walls. Maintenance is part of quality, not a separate task. Worn check rings, plugged vents, scaling in cooling channels, and damaged gates all shift the process. The best tutorial mindset is to treat every defect as evidence. When teams use structured troubleshooting instead of random adjustment, yield improves faster, scrap falls, and startup time shrinks.
Injection molding for polymers becomes much easier to master when readers see it as an interconnected system rather than a machine that melts plastic and pushes a button. Material choice influences drying, shrinkage, strength, and appearance. Part geometry determines flow path, cooling behavior, ejection risk, and tool complexity. Mold design governs venting, thermal balance, gate performance, and maintenance life. Process settings convert those design choices into repeatable output only when they are developed systematically. That is why this tutorial hub should anchor the broader tutorials and guides section within educational resources: it gives learners a map for every deeper topic that follows, from runner design and gate selection to defect analysis and process validation. The main benefit of understanding injection molding is practical confidence. You can ask better questions, avoid costly redesigns, communicate clearly with molders and toolmakers, and make decisions grounded in process reality. Use this article as your starting point, then build outward into focused guides on materials, tooling, scientific molding, and quality methods to turn basic familiarity into production-level skill.
Frequently Asked Questions
What is polymer injection molding, and why is it used so widely?
Polymer injection molding is a manufacturing process used to produce plastic parts in high volumes with excellent repeatability. The process begins by feeding polymer pellets into a heated barrel, where the material is melted and mixed by a rotating screw. That molten plastic is then injected under pressure into a precisely machined metal mold cavity. Once the material cools and solidifies into the shape of the cavity, the mold opens and the finished part is ejected. This cycle can happen very quickly, which makes the method especially valuable for large-scale production.
It is used so widely because it combines speed, consistency, and design flexibility. Many everyday items are made this way, including bottle caps, appliance housings, storage containers, medical disposables, automotive trim pieces, electrical enclosures, clips, knobs, and consumer product shells. Manufacturers rely on injection molding because it can produce complex geometries, fine surface details, integrated features such as snap fits or bosses, and tight dimensional tolerances. Once the mold is built, the cost per part becomes very low at high volumes, which is one of the biggest reasons this process is so important in modern manufacturing.
Another major advantage is material versatility. A broad range of thermoplastics can be molded to deliver different combinations of strength, flexibility, chemical resistance, transparency, heat resistance, and appearance. That allows engineers to tailor a part to its application while still using the same basic manufacturing method. In practical terms, polymer injection molding is everywhere because it offers an efficient path from raw material to finished, functional, and often visually refined products.
How does the injection molding process work step by step?
The injection molding cycle follows a sequence of controlled stages. First, polymer pellets are loaded into a hopper and fed into the machine’s heated barrel. Inside the barrel, a reciprocating screw rotates to move the material forward while heat and shear melt the polymer into a uniform molten state. During this stage, the screw also meters the shot size, which is the exact amount of material needed to fill the mold cavity and compensate for shrinkage.
Next comes injection. The screw moves forward like a plunger, forcing the molten polymer through the nozzle, into the runner system, and through the gate into the mold cavity. The mold itself is clamped shut with significant force to resist the pressure of the incoming material. Once the cavity is filled, the machine enters the packing or holding phase. Additional pressure is applied for a short time to push more material into the cavity as the plastic begins to cool and shrink. This step is critical for achieving proper part dimensions and avoiding defects such as sink marks or short shots.
After packing, the part continues to cool inside the mold until it is rigid enough to be removed without distortion. Cooling often represents a large portion of the total cycle time, so mold temperature control and cooling channel design are very important. When the part has solidified sufficiently, the mold opens and ejector pins or other ejection systems push the part out. The mold then closes, and the cycle starts again. Although the sequence sounds simple, each stage must be carefully controlled because temperature, pressure, speed, cooling rate, and mold design all strongly influence the quality of the final product.
What types of polymers are commonly used in injection molding, and how do manufacturers choose among them?
Most injection-molded parts are made from thermoplastics, which soften when heated and solidify when cooled. Common materials include polypropylene, polyethylene, polystyrene, ABS, polycarbonate, nylon, acetal, and thermoplastic elastomers. Each material family offers distinct performance characteristics. For example, polypropylene is popular because it is lightweight, chemically resistant, and relatively inexpensive. ABS is valued for toughness, dimensional stability, and a good surface finish. Polycarbonate is chosen when impact resistance and clarity are important. Nylon is often used for parts that require good mechanical strength and wear resistance.
Material selection usually starts with the function of the part. Engineers consider whether the component must withstand loads, repeated flexing, elevated temperatures, chemicals, moisture, sunlight, or electrical requirements. They also look at cosmetic needs such as colorability, gloss, texture, and transparency. A medical disposable may need sterilization compatibility and regulatory compliance, while an automotive interior component may need impact resistance, heat stability, and a specific appearance. In many cases, fillers or reinforcements such as glass fiber are added to improve stiffness or strength, although these modifications can also affect flow behavior, shrinkage, and mold wear.
Manufacturers also evaluate processability and economics. Some polymers flow easily into thin-walled sections, while others require higher temperatures or pressures. Resin cost, cycle time, expected production volume, and recyclability may all influence the final decision. In short, choosing a polymer is a balance between performance requirements, design goals, manufacturing efficiency, and budget. The best material is not simply the strongest or cheapest one; it is the one that most effectively meets the needs of the product and the realities of production.
What are the most common defects in injection-molded polymer parts, and what causes them?
Injection-molded parts can show a range of defects if the process, material, or mold is not properly optimized. One common issue is a short shot, where the mold cavity does not completely fill. This can happen because the melt temperature is too low, the injection pressure is insufficient, the gate is too small, or the material loses heat too quickly before reaching all areas of the cavity. Flash is another common defect, appearing as excess material along the parting line or around ejector features. Flash often results from excessive injection pressure, poor mold fit, worn tooling, or inadequate clamping force.
Sink marks and voids are also frequently encountered, especially in thicker sections. These occur when the outer layer cools first while the interior continues to shrink, pulling the surface inward or creating internal empty spaces. Warpage happens when different regions of the part cool and shrink unevenly, causing distortion. This may be related to part geometry, material behavior, mold temperature imbalance, or improper gate placement. Weld lines form where two flow fronts meet, and they can weaken the part or affect appearance if the melt does not fuse properly. Burn marks may appear if trapped air ignites from compression or if the material degrades due to excessive heat.
Surface defects such as flow lines, jetting, splay, and poor gloss can also occur. These are often tied to melt flow behavior, moisture in the resin, gate design, or inconsistent processing conditions. Solving defects usually requires a systematic approach: check material condition, verify machine settings, review mold design, and study the part geometry. In practice, defect reduction is one of the most important skills in injection molding because product quality depends on managing the interaction between material properties, tooling, and process parameters.
What design and process factors are most important for successful polymer injection molding?
Successful injection molding depends heavily on designing parts specifically for the process. One of the most important design principles is maintaining uniform wall thickness whenever possible. Uniform walls help the molten polymer flow more evenly and cool more consistently, which reduces the risk of sink marks, voids, and warpage. Sharp corners should usually be replaced with radii because smooth transitions improve flow and reduce stress concentrations. Draft angles are also essential, since they allow parts to release from the mold more easily and reduce the chance of scuffing or damage during ejection.
Features such as ribs, bosses, snap fits, and holes should be designed carefully so they add function without creating molding problems. For example, ribs can improve stiffness without making a wall excessively thick, but if they are too large they may cause visible sink on the opposite surface. Gate location is another critical consideration because it influences how the mold fills, where weld lines form, how pressure is distributed, and how the part shrinks. The runner system, venting, cooling channels, and ejection method all contribute to part quality and cycle efficiency. Even an excellent material choice can underperform if the mold design is poor.
On the processing side, key factors include melt temperature, mold temperature, injection speed, injection pressure, holding pressure, cooling time, and screw recovery conditions. These settings must be tuned to the polymer and part design. Too much heat can degrade the resin, while too little can lead to incomplete filling. Cooling that is too short may cause deformation after ejection, while overly long cooling increases production cost. In high-quality molding operations, success comes from treating part design, mold design, material selection, and process control as one integrated system. That is the real foundation of reliable, efficient polymer injection molding.